

Easy & Authentic Homemade Pasta from Scratch
Disclosure: This post may contain affiliate links; more info here.
Many years ago, I took an incredible cooking class in Tuscany where I learned how to make this authentic homemade pasta recipe.
And after dozens of cooking classes in Italy since, this is still one of my go-to recipes, alongside authentic bolognese sauce and classic minestrone soup.
When I want to eat pasta at home, it's difficult to bring myself to use the store-bought stuff. There's simply nothing like homemade pasta. And, honestly, it's so quick and easy to make my own pasta from scratch, I have no excuse not to. After you try this from-scratch pasta recipe, I'm sure you'll feel the same.
Ingredients for Fresh Pasta
First things first! The ingredients necessary to make this recipe…
To make this authentic homemade pasta recipe, you need four ingredients:
- extra virgin olive oil,
- eggs,
- salt, and
- flour.
Note, however, that you can't use any flour! You need a specific type of very soft, very fine flour, also known as “00” flour.
It can be difficult to find “00” flour in the grocery store, but you can buy this “00” flour online! Also, keep in mind that this type of flour is ideal for making Neapolitan-style pizza dough.
Making Pasta Dough From Scratch: By Hand or Mixer?
In Italy, I learned how to make this authentic homemade pasta recipe by hand. But at home, I prefer to use my Stand Mixer and our Pasta Roller and Cutter Set.
These gadgets make pasta-making a breeze, and if you don't already have a mixer and pasta attachment, I highly recommend it!
The mixer allows you to easily throw together a batch of pasta dough. Meanwhile, the pasta roller flattens out your dough into very thin sheets and the pasta cutter slices your dough into whatever noodle type you want, such as spaghetti or fettuccine.
How to Make Pasta by Hand
Making your pasta dough by hand is more labor-intensive and takes a little longer. However, there is something to be said for making pasta the traditional way, like we learned to do in Italy!
To make the dough by hand, you'll simply follow the recipe below to make the dough. Then you'll roll it out – getting your pasta sheets as thin as you can – and cut noodles into your desired width with a pizza cutter or a knife.
NOTE: Below, I will explain both how to make the pasta with a mixer and pasta attachment, as well as by hand. Instructions for making the pasta by hand are noted with “BY HAND” below.
Steps for Making Authentic Homemade Pasta
Are you ready to try out this authentic homemade pasta recipe? Let's do it!
Step 1: Add the ingredients
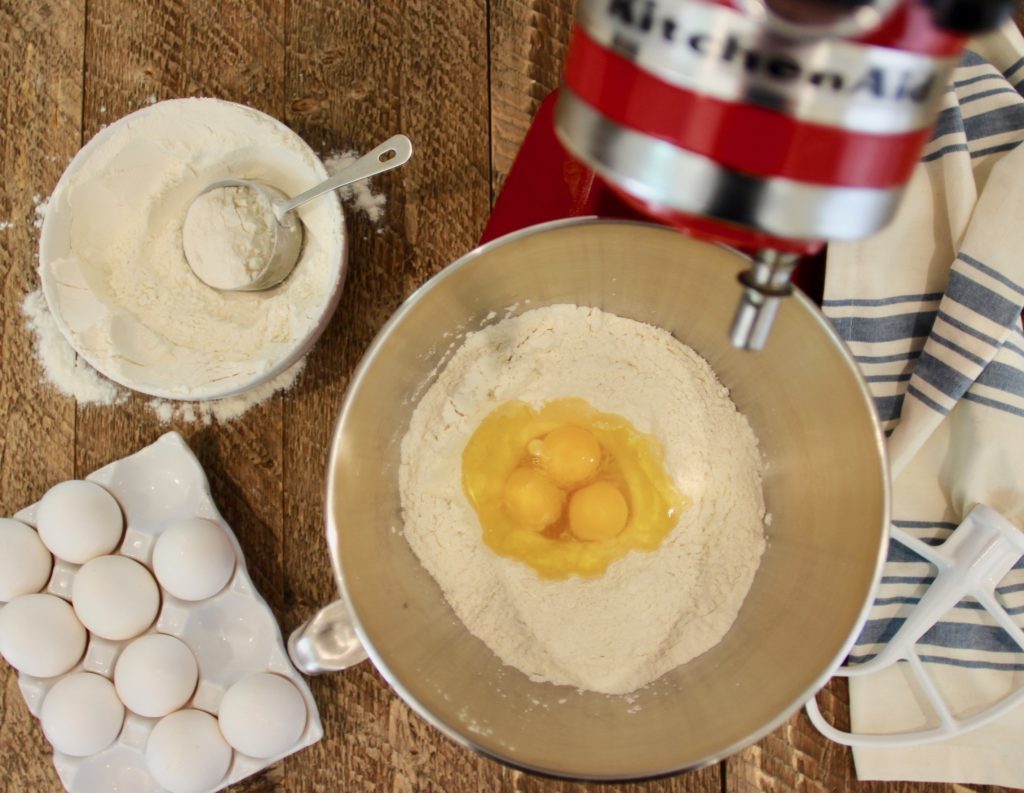
- First, in your mixer bowl, add in the “00” flour and create a well in the middle of the pile with your hand. Then, crack your eggs into the well, along with your salt and extra virgin olive oil.
BY HAND: If you're not using a mixer, simply do this on a clean surface.
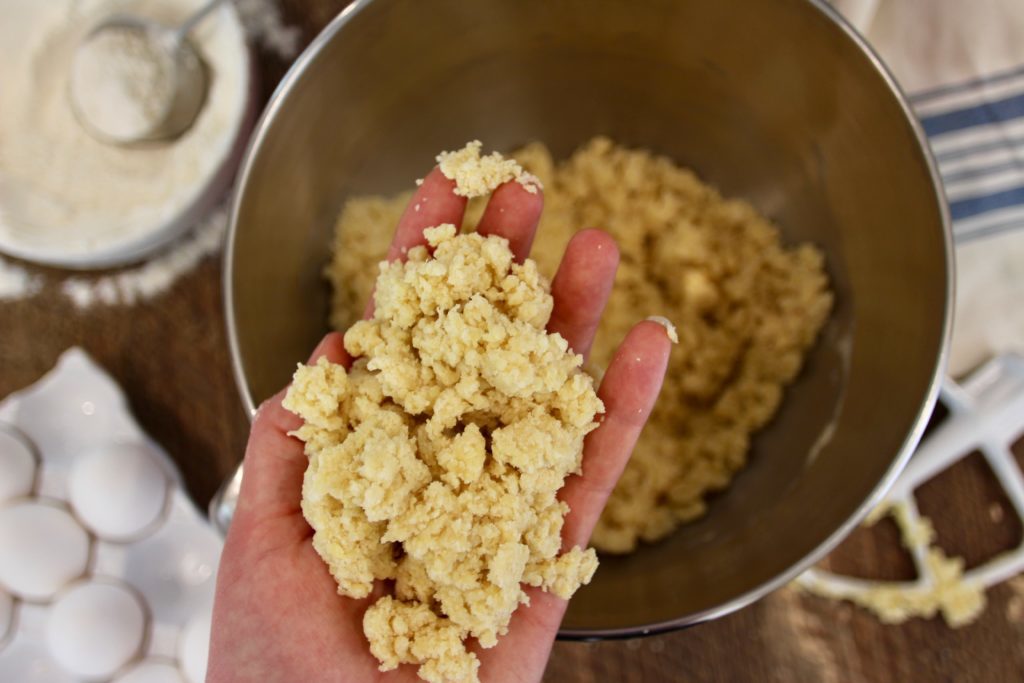
Step 2: COMBINE the ingredients
- Next, attach your paddle to your mixer and set it to the lowest speed.
- Turn on your mixer and run it until the ingredients incorporate and the dough comes together into small, sticky clumps – such as in the photo above. Depending on the size of your eggs, you may need to use more or less.
BY HAND: Use a fork to lightly whisk together the eggs, salt, and olive oil, meanwhile gradually adding flour from the edges of the well. Continue doing so until the dough comes together with a sticky consistency.
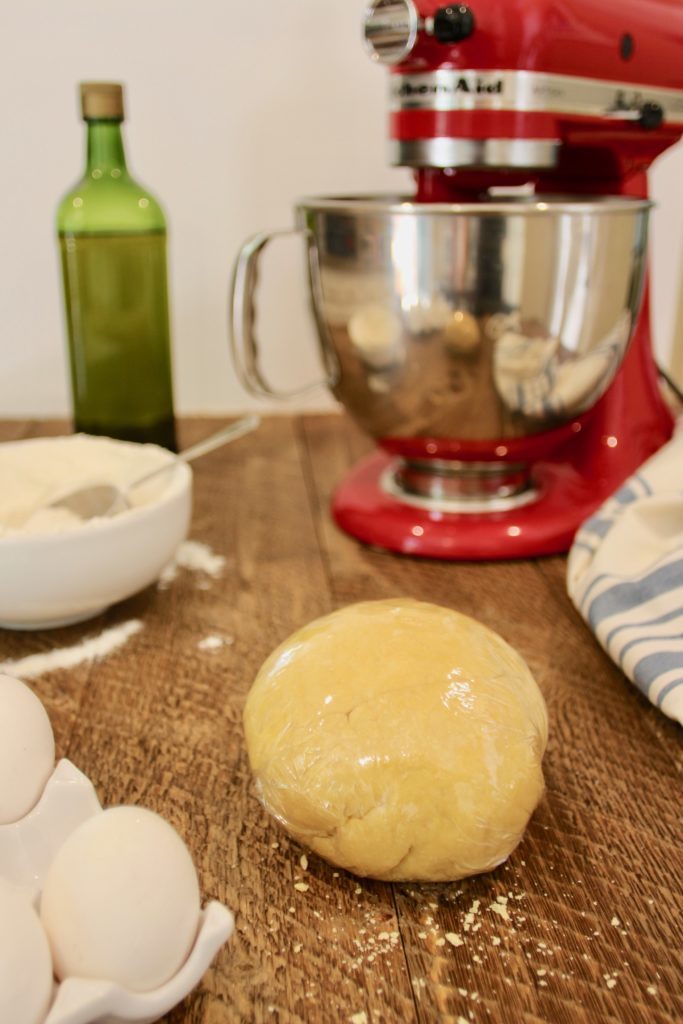
STEP 3: KNEAD the dough
- Next, gently knead the dough with your hands for about 10 minutes. Add flour to your work surface as needed, to ensure your dough does not stick.
- Once your dough is smooth, form it into a ball and tightly wrap it in plastic wrap. Then place it in the refrigerator to chill for 15 minutes.
BY HAND: Follow the same instructions as above.
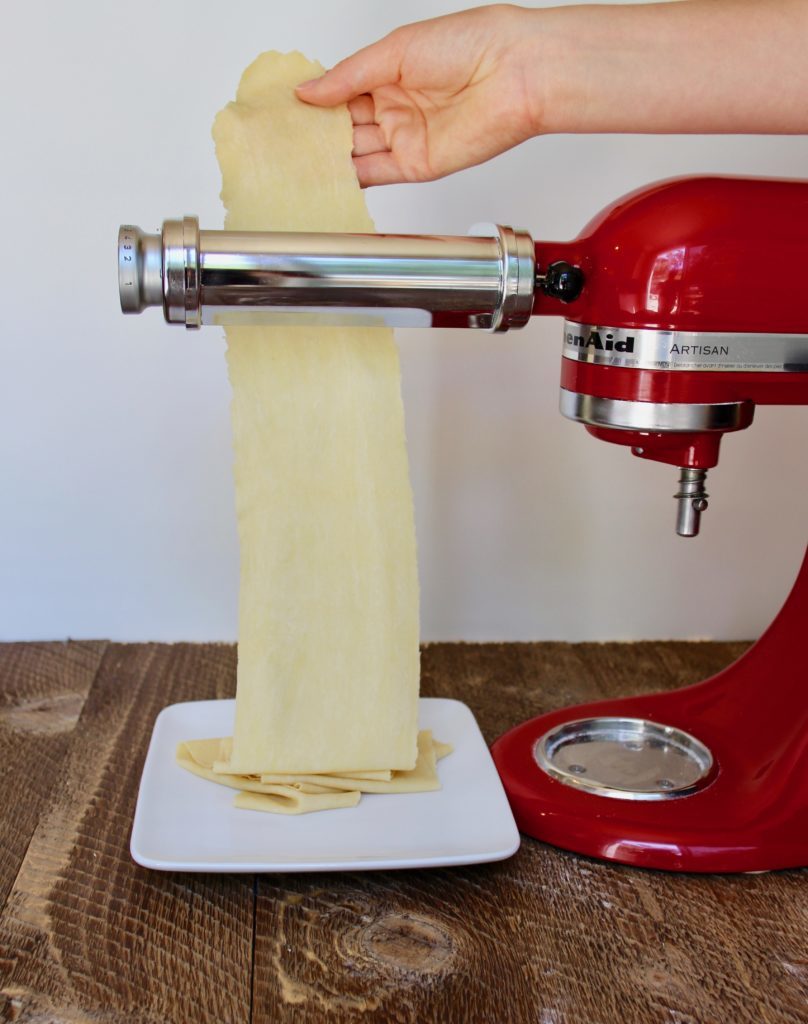
STEP 4: CUT & ROLL out the dough
- Next, take your dough out of the refrigerator and cut it into three even pieces.
- Insert your pasta roller onto your mixer and set the mixer to the lowest setting.
- Then, turn your mixer on and run the dough through the pasta roller. Start with setting #1 – the widest setting – and continue the process through setting #8 – the thinnest setting.
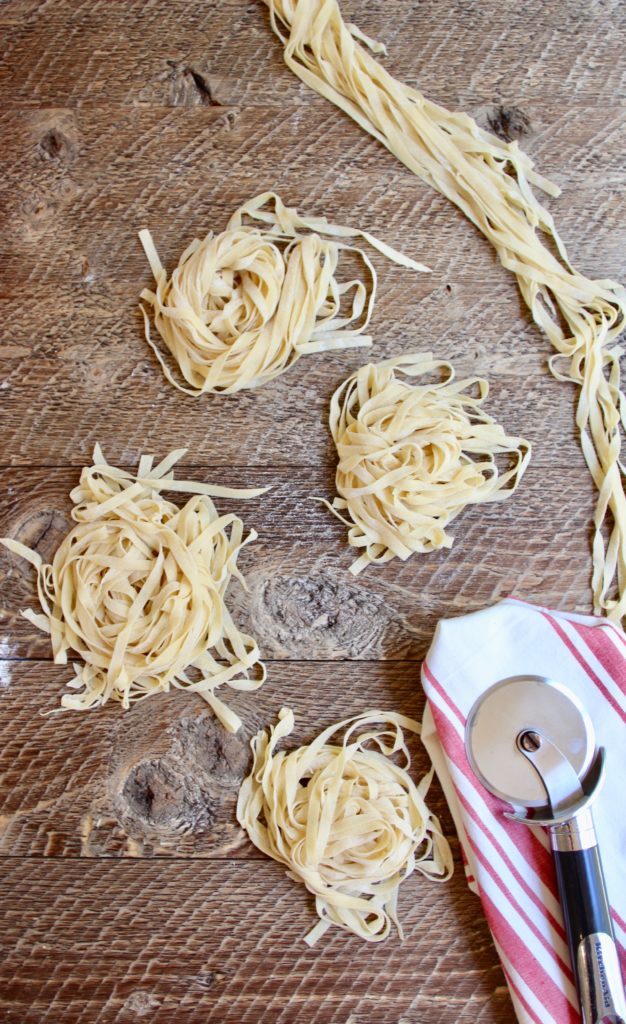
- By the end of the process, your pasta sheets will be thin enough to start cutting!
BY HAND: Grab your rolling pin and get to work! Cut your dough into three even pieces. Then, roll out your dough as thinly as possible, making sure it's no thicker than 3 mm throughout your entire pasta sheet. Remember to add flour to your work surface as needed, to prevent your dough from sticking.
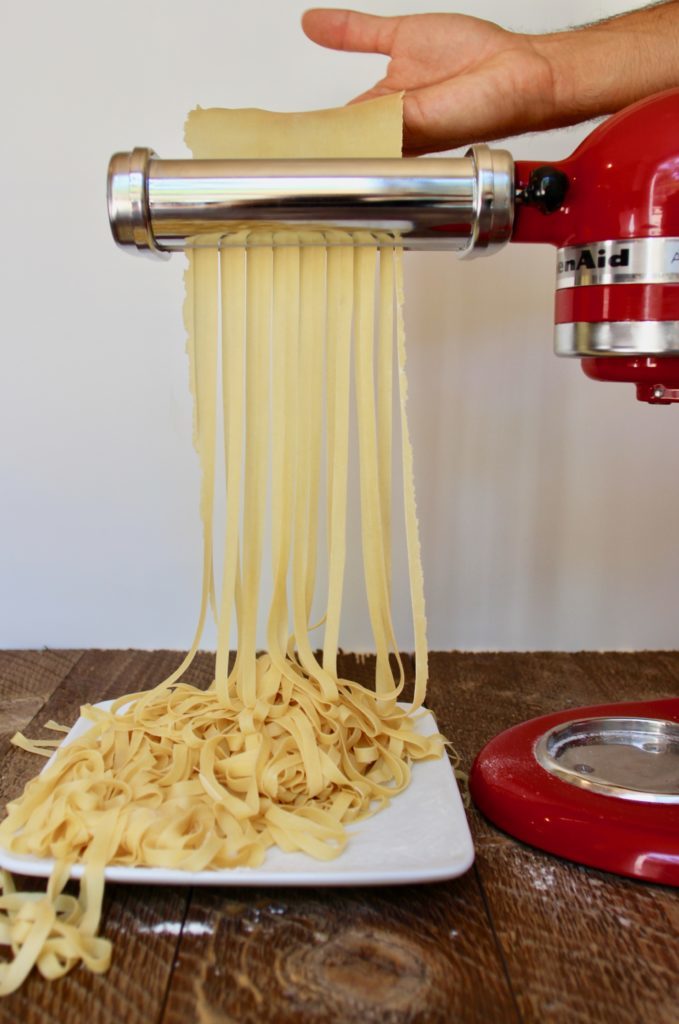
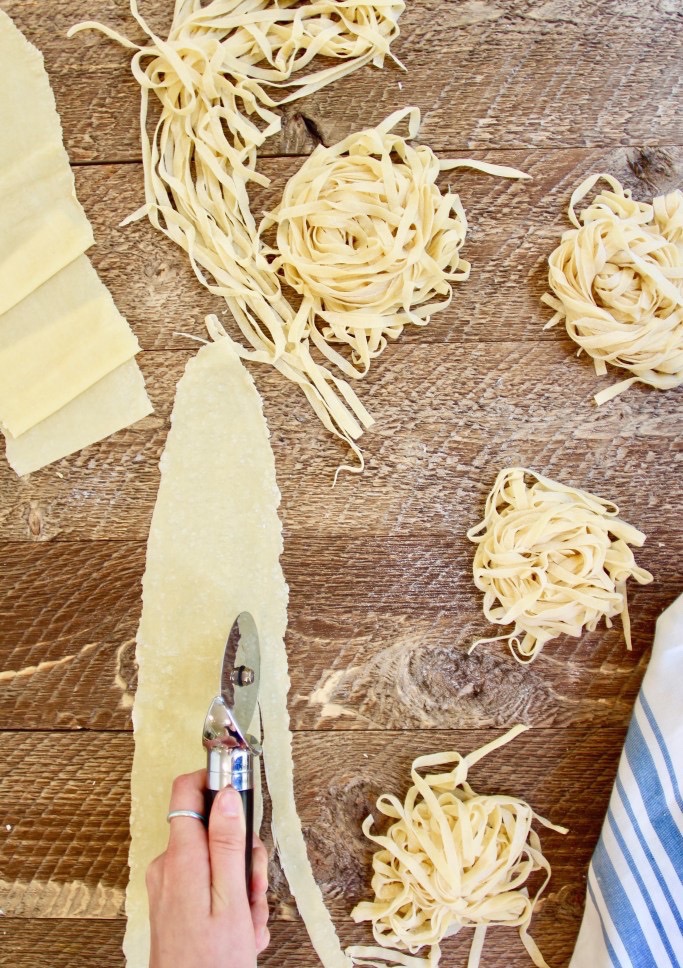
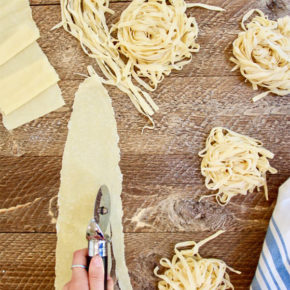
STEP 5: Cut the dough into pasta noodles
- Next, remove the pasta roller from your mixer and insert the pasta cutter of your choice.
- Then, simply turn your mixer on to the lowest speed, and feed your pasta sheets through the cutter!
- It's as simple as that.
- Your pasta sheets will come out the other end as beautiful, fresh noodles, and you'll hardly be able to contain your excitement.
BY HAND: To cut your noodles without the pasta cutter, you should fold your sheets over themselves into layers. Then, cut the sheets lengthwise into strips and unravel them. Then, your noodles will be ready to cook!
How to Cook Fresh Pasta
And now, for the best part.
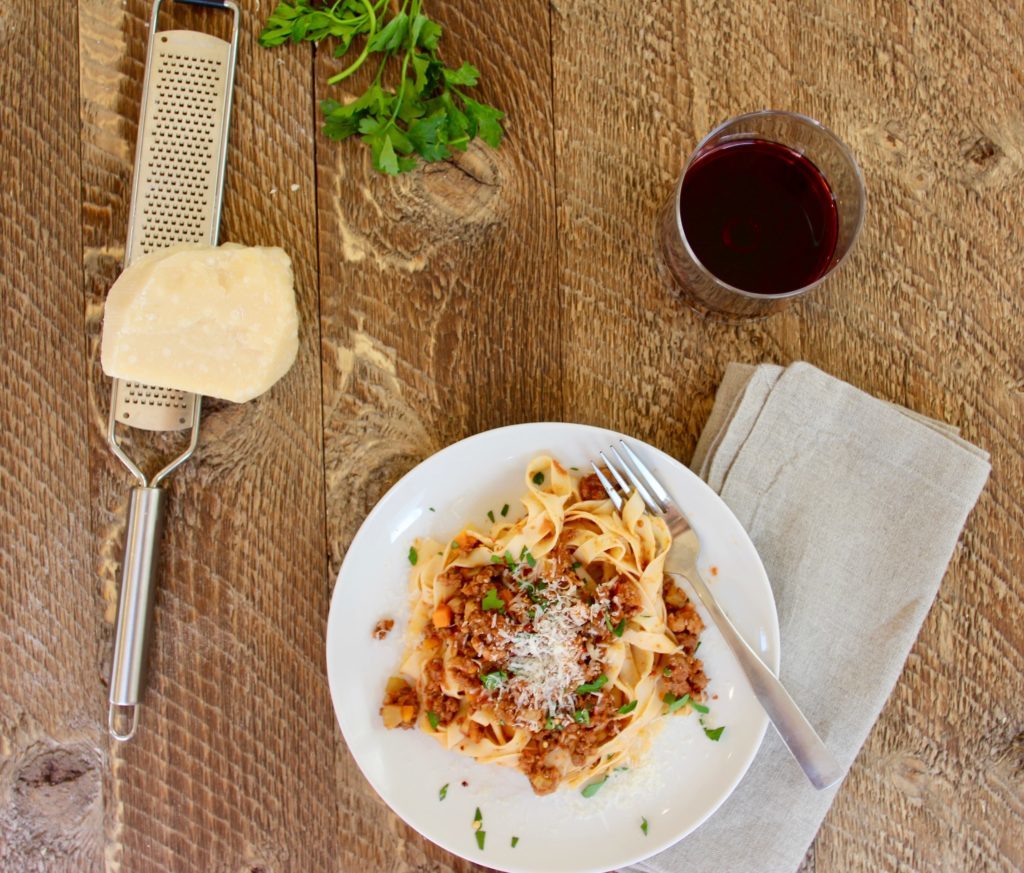
All that's left to do is boil your noodles, mix them into your sauce, and eat it all up!
To cook your pasta, simply bring a pot of salted water to a boil, and then cook your pasta until it rises to the surface and is al dente. This shouldn't take more than two or three minutes.
Then, let the feast begin!
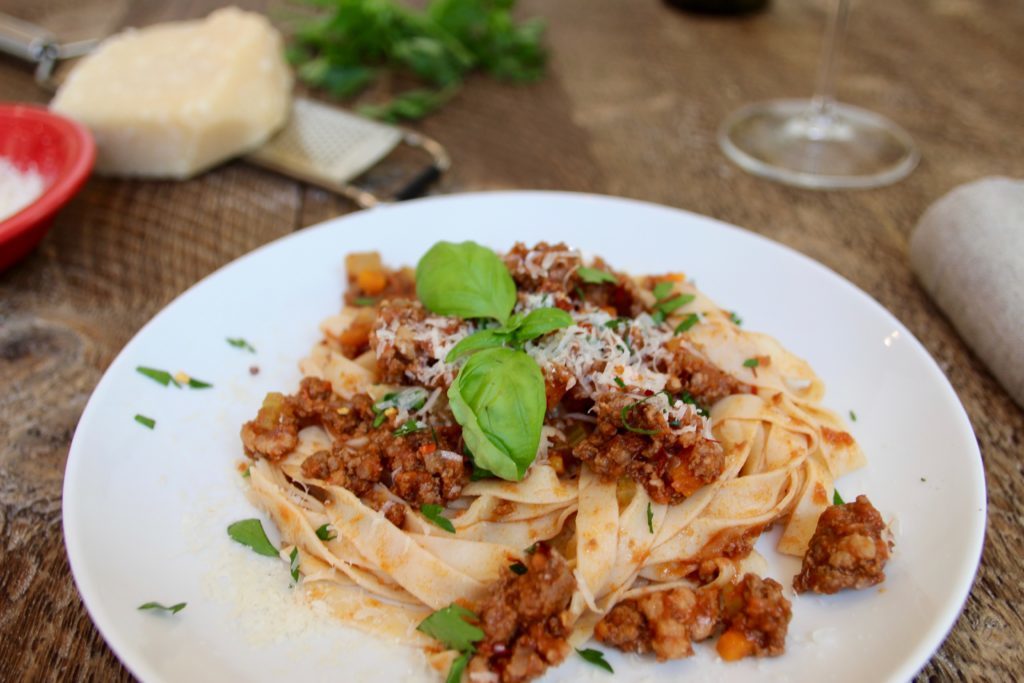
- Use your fresh lasagna sheets to make my Best Vegetarian Lasagna Bolognese (vegetarian) or my Best-Ever Lasagna Bolognese with Fresh Pasta & Béchamel (meat-based).
- Or pair your pasta with my Vegan Bolognese Sauce (made with mushrooms, lentils, and walnuts) or with my Traditional Meat-Based Bolognese!
How to Make Pasta From Scratch: Authentic Homemade Pasta Recipe
If you're ready to take your pasta dishes to the next level, store-bought pasta just isn't going to cut it. In this post, we detail exactly how to make pasta from scratch, with or without a stand mixer, pasta roller, and pasta cutter. Here's our authentic homemade pasta recipe, which we learned during a cooking class in Florence, Italy! Buon appetito!
- Prep Time: 55 minutes
- Cook Time: 5 minutes
- Total Time: 60 minutes
- Yield: 6 people 1x
- Category: Main Course
- Method: Mixer/Knead
- Cuisine: Italian
- Diet: Vegetarian
Ingredients
- 3 cups “00” flour
- 4 large eggs
- 1 tbsp extra virgin olive oil
- 1 tsp salt
Instructions
- In your mixer bowl, add in the “00” flour and create a well in the middle with your hand.
- Crack your eggs into the well, along with your salt and extra virgin olive oil.
- Attach your paddle to your mixer and set it to the lowest speed.
- Mix until the ingredients incorporate and the dough comes together into small, sticky clumps.
- Gently knead the dough with your hands for about 10 minutes, until smooth. Add flour to your work surface as needed, to ensure your dough does not stick.
- Form the dough into a ball and tightly wrap in plastic wrap. Place in the refrigerator to chill for 15 minutes.
- Remove your dough from the refrigerator and cut it into three even pieces.
- Replace the mixer paddle with the pasta roller. Set the mixer to the lowest speed and turn it on. Run each piece of dough through the pasta roller. Start with setting #1 — the widest setting — and continue the process through setting #8 — the thinnest setting.
- Remove the pasta roller and insert the pasta cutter of your choice. Turn your mixer on to the lowest speed, and feed your pasta sheets through the cutter.
- To cook the pasta, boil a pot of salted water, and cook the pasta until it rises to the surface and is al dente — about two or three minutes.
- Combine your freshly cooked pasta with a sauce of your choice and enjoy!
Notes
If you're making pasta without a stand mixer, pasta roller, and pasta cutter, refer to the parenthetical, italicized directions in the blog post above!

This is such a beautifully explained recipe! I’ve tried making homemade pasta before, but I always struggled with getting the dough texture just right. Your step-by-step breakdown and the visual tips really helped me understand where I was going wrong. I’m going to try this method over the weekend — thank you for sharing such an authentic approach!
I’m so glad to hear this, Susan! Please share your results!