

Authentic Thai Yellow Curry with Chicken
Disclosure: This post may contain affiliate links; more info here.
Do you ever have those days where you wake up and think, “I would do anything right now, to be on a sunny island in Thailand, with a big, spicy bowl of curry in front of my face”?
Because I do. And today was one of those days.

Inconveniently, though, I’m over here in California. And no matter how much I want it to be, going to Thailand just isn’t on the agenda today.
So instead of pouting, I’ve decided to bring Thailand to me.
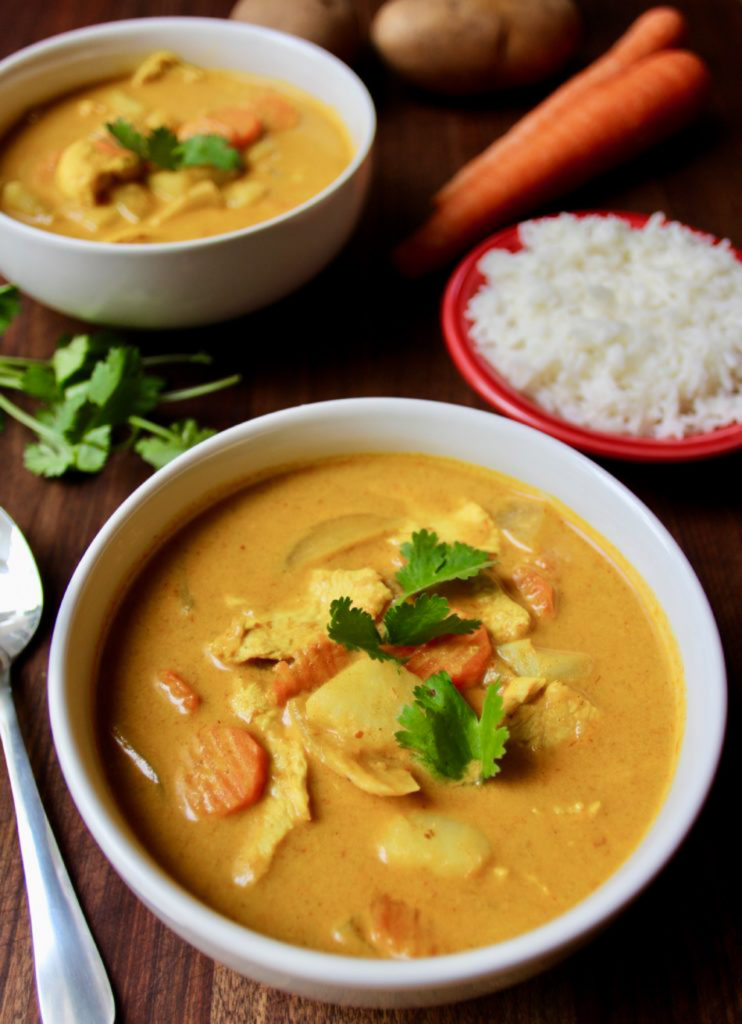
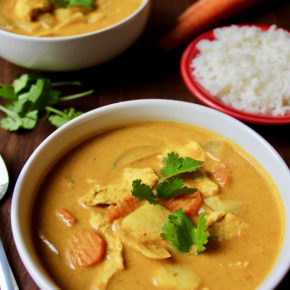
Today, I’m cooking up a big ol’ pot of Thailand, in the form of some creamy yellow curry, packed with tender chicken, potatoes, carrots, and onions.
I know I can hardly wait to share my Thai yellow curry recipe with you. So let me ask you one thing.
Are you ready for this?!
How to Make Authentic Thai Yellow Curry
This Thai yellow curry recipe couldn’t be easier to make, and it couldn’t be more satisfying either.
It’s one spicy, creamy, flavorful trip to Thailand, packed into one bowl. And it’s healthy, too!
Serve this curry over some rice, and garnish with a pinch of cilantro, and you’ll transport yourself to a faraway land — the Land of Smiles — where the sun is hot, the curry is even hotter, the Asian elephants roam, and the beaches are nothing short of screensaver material.
Which Curry Paste Should You Use?
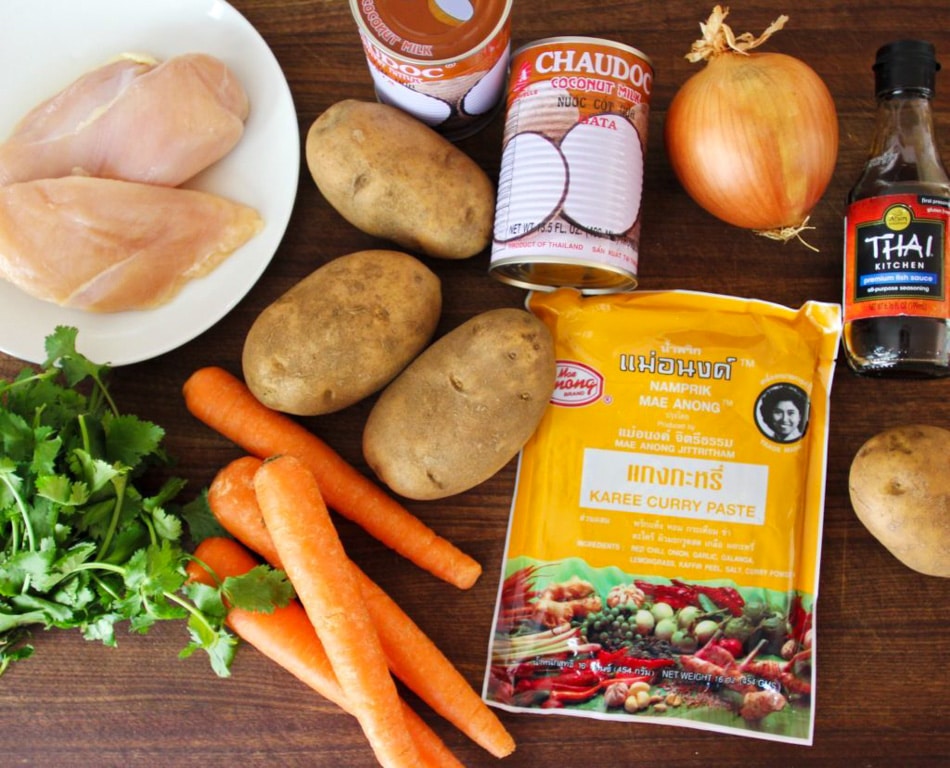
To make this Thai yellow curry recipe properly and authentically, you need one very important ingredient: Authentic Thai Yellow Curry Paste.
If you search high and low, you might be able to find yellow curry paste at the grocery store. But if you want your curry to taste just like the curry you’ve had in Thailand – or at your favorite Thai restaurant – you need this curry paste, which is imported straight from Bangkok. Most of the pastes you’ll find in the grocery stores and Asian markets just don’t cut it.
Trust me on this one.
Note: If you can get your hands on the Mae Anong (it’s often sold out), then get it… and stock up! It’s the best. If you can’t, then a very close second best is the Mae Ploy. Truly though, both are great.
The hardest part about this Thai yellow curry recipe is simply waiting for the mailman to deliver your beautiful parcel of curry paste.
Once you have it, all you need to do is thinly slice your chicken, chop up your vegetables, and let the curry paste work its magic.
And of course, you can’t forget to throw in some of that thick and luscious coconut milk. Mmmmm. Yes, please.
Which Coconut Milk Should You Use?
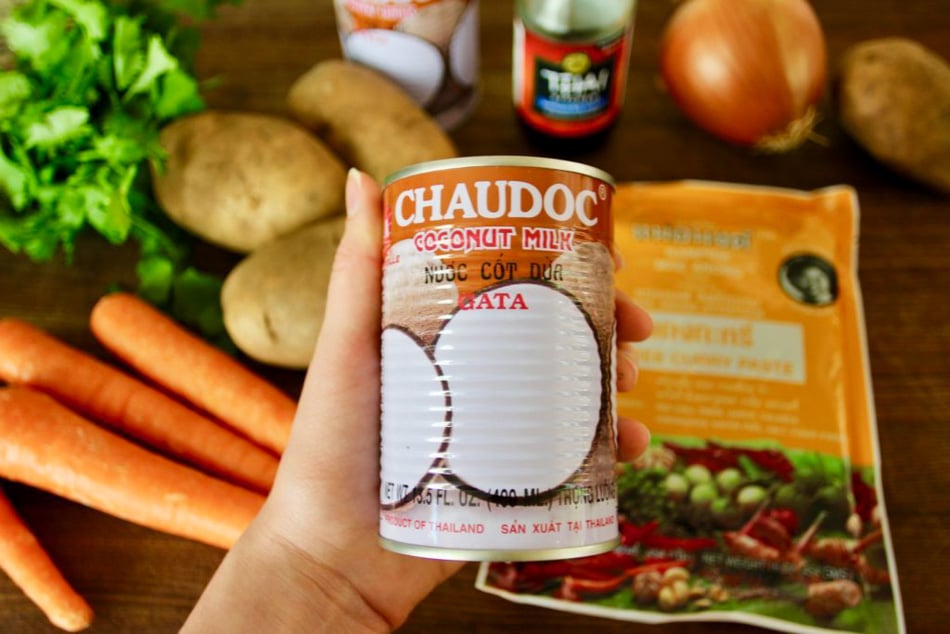
Just like choosing the right curry paste, it’s important to get high-quality coconut milk.
The quality of coconut milk brands varies widely. When you’re shopping, look at the ingredients list to find the product with the highest coconut solids to water ratio, ideally with no extra additives. You may need to trial and error a few different brands to find the one you prefer. Low-quality coconut milk will result in a more “soupy” or “runny” curry.
Traditionally, Thai curries are not supposed to be extremely thick. If you prefer a thicker curry, you can simply substitute coconut milk for coconut cream. And again, the same rules apply. Check the ingredients list; see if you can find a can of 100% coconut kernel extract, with no extra water, thickeners, or other additives listed on the label.
Authentic Thai Yellow Curry Recipe with Chicken
A staycation never looked so good. Am I right?
Seriously, this stuff is the real deal.
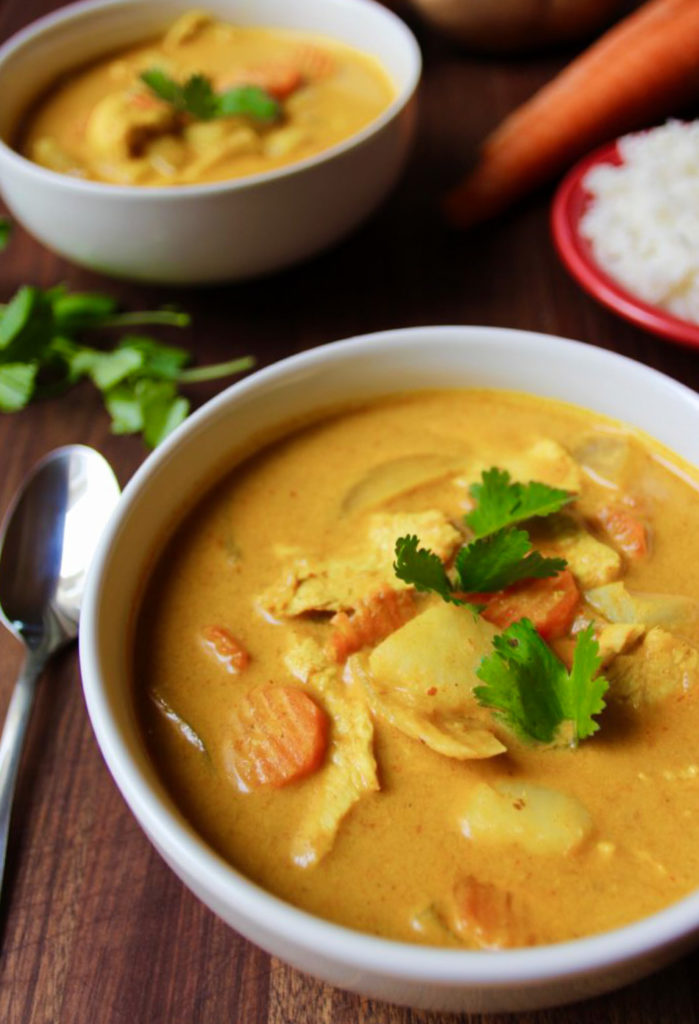
Making this Thai yellow curry recipe is like taking a trip to Thailand, but without the jet lag and the expensive plane ticket. It’s creamy, spicy, and healthy, and it’s everything you’ve been needing in your life.
And if you don’t have all the ingredients, don’t worry! This recipe is very versatile, so you can add in whatever vegetables and proteins you have on hand.
This Thai yellow curry is authentic and absolutely delicious. And now that you’ve seen this post, you know you want to make it! So what are you waiting for?!
Get your authentic Thai curry paste on Amazon:
- Mae Anong Curry Paste (my top choice!)
- Mae Ploy Yellow Curry Paste
Authentic Thai Yellow Curry with Chicken
Craving some authentic Thai yellow curry? Don’t have the time to take an island vacation? Well, this simple, spicy, and delicious recipe will take your tastebuds on a journey to Thailand, and you don’t even have to leave your own kitchen.
- Prep Time: 20 minutes
- Cook Time: 15 minutes
- Total Time: 35 minutes
- Yield: 4 people 1x
- Category: Main Dish
- Method: Stove
- Cuisine: Thai
Ingredients
- 1 tbsp virgin coconut oil
- 4 tbsp yellow curry paste
- 2 15-ounce cans of coconut milk (high quality, see notes)
- 1 or 2 cups chicken stock
- 4 carrots, peeled and sliced into 1/8” rounds
- 4 medium-size potatoes, peeled and cut into bite-size pieces
- 1 yellow onion, sliced into wedges, then halved
- 2 chicken breasts, very thinly sliced
- 1.5 tsp fish sauce, plus more to taste
- 3/4 tsp salt, plus more to taste
- 1.5 tsp sugar, plus more to taste
- cilantro, for garnish
- lime wedges, for garnish
- serve with jasmine rice
Instructions
- In a large pot, heat the coconut oil over medium-high heat.
- Add the curry paste to the oil, and stir-fry until fragrant, about two minutes. Take care to scrape any bits that stick to the bottom of the pot with your spoon.
- Spoon in the coconut solids from the top of the can first, and allow it to fry with the paste for a minute. Stir in the rest of the coconut milk (or coconut cream) and 1 cup of chicken stock. If you would like the curry to be thinner/soupier, then you can add 1 more cup of stock. Bring to a low boil, then turn the stove down to a simmer.
- Stir in the potatoes. When the potatoes are about halfway cooked through, stir in the carrots and onions.
- Once the carrots are almost fork-tender, add in the thinly sliced chicken and cook for two or three minutes, until the chicken is just cooked through and tender. Pay attention not to overcook the chicken, this process doesn’t take long.
- Remove the pot from the heat. Stir in the fish sauce, salt, and sugar, adjusting each to suit your tastes.
- Serve the curry in bowls, over jasmine rice. Garnish with cilantro and lime wedges.
Notes
- The quality of coconut milk brands varies widely. When you’re shopping, look at the ingredients list to find the product with the highest coconut solids to water ratio, ideally with no extra additives. You may need to trial and error a few different brands to find the one you prefer. Low-quality coconut milk will result in a more “soupy” or “runny” curry.
- Traditional Thai curries should be on the soupier side, but not too thin either. If you prefer a thicker curry, substitute one or two cans of coconut milk for coconut cream. And again, the same rules apply. Look at the ingredients list. See if you can find cans of 100% coconut kernel extract, with no extra water, thickeners, or other additives listed on the label.
- If your curry still ends up “soupy” or “runny” for your liking, you can thicken it with a slurry of cornstarch and water.
- Want your curry to be spicier/hotter? Adding more curry paste will not do the trick, since yellow curry paste is pretty mild to begin with. Instead, add some red Thai/bird’s eye chilies in with the curry paste at step 2! You can use fresh Thai chilies (just leave them whole and remove them before serving your curry) or use Thai chili powder. If using fresh chilies, add up to 5 whole chilies. If using powder, add up to 1 tsp. This is up to your taste and spice tolerance!
- Make sure to purchase this yellow curry paste from Amazon. While you might be able to find other yellow curry pastes at the grocery store, none of them are as authentic as this one, which comes straight from Thailand!
- If you don’t have virgin coconut oil, you can also use vegetable oil.
- You can make this recipe vegetarian/vegan by simply omitting the chicken and fish sauce. Use soy sauce or vegan fish sauce instead, to taste. For gluten free, use tamari.
- We used a mandoline to cut all of the carrots equally and to give them the fun, ridged texture you’d see in a restaurant.
- Some curry pastes are saltier than others. If you don’t use the curry paste I suggest, you may need to use more or less salt and fish sauce than the recipe calls for. Use your tastebuds to decide!

Hi,
The flavor of this was pretty good, but I had a few observations.
-I always prefer recipes that give me the actual weights of vegetables in addition to the number of vegetables. This makes it easier to scale recipes based on what I have or to make substitutions. I used baby potatoes sliced in half rather than Yukons.
-I like recipes that give me approximate times for various steps. This helps me coordinate preparation of multiple dishes or gives me an idea of the time I’ve got to do something else. In particular, it would be good to have an approximate cooking time for the carrot slices.
-I tried using my mandoline to make wavy carrot slices, and found it to be a potentially dangerous endeavor. I couldn’t use the hand guard to slice the carrots end on, but rather had to do each one by hand, taking great care to avoid the blade. On my mandoline, 1/8th inch slices were hard to do. Further, the 1/8th inch slices overcooked slightly. Next time I’ll make them thicker.
-I agree with other posters that cooking the potatoes in the same pot with the sauce would have been simpler. It took about 4 minutes for the carrot slices to become tender followed by 3 minutes for chicken, so…I would have added the potatoes, cooked for about 3 or 4 minutes, and then added the carrots, onion and chicken.
-I found the sauce to be a little thin and the curry a bit strong. My personal preference would be to cut down on both.
My first attempt at any curry and this recipie is just wonderful as is, which makes me very happy! My Husband told me he wasn’t very hungry for dinner and then proceeded to eat a big bowl of it and proclaim I can make it again! Thank you!
I am just waiting for my amazon package to arrive so I can make this delicious looking recipe! I have one question- it never fails that I mess up any recipes using coconut milk. Whenever I open a can it always has solid substance at the bottom and liquid at the top. So, do I open the can and only use the liquidy stuff? Do I use the solid stuff only? Or do I shake the Can and mix it all together and just use it all?
Hi Jenny,
Great question. If you are using a can of coconut milk, you will see that the coconut solids separate from the liquid and float to the top of the can. Per step #3 of the instructions, first you will scoop out the solids to fry off the curry paste, then add in the rest later. Don’t shake it up, by frying the solids with the paste, you will develop the flavor better – this is the Thai way.
When you purchase your coconut milk, make sure to look at the ingredients and buy the can with the highest ratio of coconut solids to water. That way, you can make sure you’ll end up with a curry that’s nice and thick. Then you can control how much stock you want to add to reach the consistency you want :)
If you like a super thick curry, you can look for coconut cream instead of milk, which will have an even higher ratio of coconut solids to water. For example, the cream I like to use is 100% coconut kernels with no liquid added.
I have recently fell in love with Thai yellow curry so I am excited to try this. Question though, is the fish sauce absolutely necessary? I hate fish and worry that by adding the fish sauce it will give the fish a fish taste. Will it still come out delicious if I omit it?
You could use salt, but then you won’t get that umami flavor from the fish sauce. I’d recommend not omitting it. Using fish sauce will not make the curry taste “fishy.”
Hi, Cami! I hate fish sauce and anything fishy, as well. I came across this substitute on Amazon and just bought it specifically for this recipe. You may want to give it a try. I haven’t used it yet but when I make this curry, I’ll post my review.
Copy and paste the link in your browser:
https://amzn.to/3u5qfIC (https://amzn.to/3u5qfIC)
Hi Jamie,
Thanks for sharing! It’s so great how many vegan alternatives have come out in the last few years. In my kitchen, we now use a vegan fish sauce that’s made from fermented kelp and other veggies. The vegan fish sauce you linked to (https://amzn.to/3s2lL3F) looks great!
Looking forward to hearing how the curry goes for you! :)
Maddy
For those who are fish haters and are concerned about adding fish sauce. I promise you won’t taste it as fishy. I made a caramelized pork dish that called for fish sauce and was very concerned that people would taste it. you couldn’t taste it and it adds something to the dish, else they wouldn’t put it in the recipe.
Made this last night and it was so so good. I was a little skeptical that the chicken could cook that quickly, but I sliced it really really really thin as directed and it came out perfect. Mine was a tad thin so I add some cornstarch to a cup and spooned some of the coconut curry liquid in to the cup at the end to make a slurry and it helped, but next time I will use the suggested coconut milk which others have said make all the difference. Thank you for this really delicious recipe, it tasted just like the one that made me fall in love with yellow curry to start with :)
Hi Natalie!
Thank you for the report back. We are so happy to hear that you loved the recipe. :)
– Maddy
This is a very good recipe! I followed the advice and bought the recommended coconut milk and paste and it tastes better than that of my favorite restaurant. The second time I made it, I substituted the coconut milk for cream. I also cooked the potatoes in the sauce. I simply added the potatoes before the rest of the vegetables and allowed it to cook until near fork ender. I proceeded to add the rest of the veggies and finished following the recipe. This is a matter of personal taste, the recipe is very good as is :)
Hi, thank you for this recipe! I just tried it. I bought my paste from an Asian store, so I felt confident with it. The taste was good, but very runny. Any suggestions to get the thick texture? Thank you, Shirley
Hi Shirley,
I suspect it could have been your coconut milk. Some brands are much runnier than others. If possible, try making it with this coconut milk brand (https://rstyle.me/n/cthjpdb2r67) next time. Then make sure to cook down the curry to the thickness and consistency you want before you add in the vegetables and chicken. And if all else fails, you can always use corn starch to thicken… However, keep in mind that Thai curries should not be very thick.
I used coconut cream instead of milk and cooked the potatoes in the sauce. It was thicker than with coconut milk.
I’m wondering if this will be too spicy for my kids. With 4 TBSP curry spice will it be more mild, medium, or hot? Wondering if I need to adjust.
Thanks
Yellow curry paste has a lot of different spices and aromats, but not very much chili, compared to a red curry paste, for example. Yellow pastes are usually mild to medium.
Hi! Can I use curry powder if I don’t have the paste?
Thanks!
You technically could…but I would not recommend it. You won’t get the same result. Curry powders are often Indian, while pastes are usually Thai, so they have completely different flavor profiles. See our Indian curry recipe (it’s my absolute favorite) if you prefer to use your curry powder!
This looks great! One question I have, how is the chicken cooked? Do i boil in a pot and shred? Cook in a pan and cut thin? Or do I put it raw and have it cook in the soup for 3 minutes? Just want to make sure I’m doing this correctly
Take your raw chicken and thinly slice it. Then you’ll add it to the curry toward the end of the process (see the directions) and it’ll cook in there – it should only take a few minutes. Enjoy!
How many servings do you get from this recipe? I’m looking to serve it to 4 adults for dinner.
Hi Jennifer! This recipe will serve 4-6, depending on your portion sizes. Please let us all know how it goes. :)
How spicy is the paste? How should I adjust the spicyness level of if i want it to be a little bit spicier?
Add as many Thai/Birds Eye chilis as you want. You can just put them in whole when you pour in the coconut cream and remove them when serving!
Is your suggestion to add chilis to make it spicy and the paste itself is not? You have not added the chili’s into your original recipe, so I think that’s why she was asking if there is spice in the paste. I’d like to know this also since my husband is a “wimp” with spice.
Hey Patricia, I’d rate yellow curry paste as “mild”. Compared to yellow and red curry, it’s the mildest! Yellow curry paste contains red chilis – as well as other aromats and spices that aren’t hot like cumin, coriander, lime leaf, etc. – but the chilis aren’t overpowering by any means. If you want it spicier, add whole Thai/birds eye chilis (as mentioned above). If you follow the recipe, and find that you want to make the flavor milder, you could add more coconut milk. Hope that helps!
Do you need to “break” the coconut milk? I tried a curry recipe recently and found that it wasn’t the right consistency bc I didn’t wait 7-10 minutes for the break (read this tip in comments section after I cooked) Ended up cheating with corn starch and it was delicious but looking for something more authentic
Hi Beth,
You can do it that way if you choose to.
However, this recipe first calls for cooking your curry paste in coconut oil, which should give you that same rich curry flavor you’re looking for. So if you have coconut oil on hand, follow this recipe and then you will add the coconut milk in at a later step.
If not, you should break the coconut milk.
What does it mean…to break the coconut milk?
This was my first time making Thai yellow curry. This recipe is easy and the curry was everything you described. It was warm and comforting and delicious. I will make this again…and again! Thank you so much!! (I bought the yellow curry paste recommended from Amazon, too!)
So glad to hear it, Bronwyn! Thank you for commenting :)
Made this last night. My daughter and I love yellow curry from one of our local restaurants. Decided to search for a recipe, so I could make it myself. Super yummy!
YUM! I just made curry last week. Mine is really similar–just add veggies, coconut milk, and curry paste (I prefer red). It’s one of those ridiculously easy meals I forget about, and then when I finally make it again I kick myself for not making it more!
Also, gorgeous photos! Look at you, miss professional food photographer ;)
-Claire
It’s so easy and sooooo good! Thank you, that means a lot! :)
Maddy I could not find the chaudoc coconut milk you suggest to use -on Amazon.😞 What do you think about the Chaukoh brand instead?-Carie
Hey Carie! If you’re shopping on Amazon, I’ve had lots of success with the Whole Foods/365 brand coconut milk (https://amzn.to/3lF4bFc) and coconut cream (https://amzn.to/3JXviVz). Choose cream if you like a thicker sauce (these days, this is my preference). I think the 365 is cheaper too. However, the Chaoukoh milk should also work!
I grew up in Thailand. (And never saw the first carrot in yellow curry there lol. I think that’s an American addition – Just potatoes and meat – chicken or beef.) And my absolute preference for coconut milk is the Chaukoh brand! Thick and creamy and fragrant and delicious! And when it was served, it was always with yummy accompaniments for toppings – pineapple chunks, roasted peanuts, crispy, quick-fried rice stick noodles, sliced banana, sliced cucumbers and sometimes cherry tomatoes. This recipe is how we always made it (minus the carrots :) ) Yummm. So easy and delicious.
Thank you, Gina!! Great ideas for toppings as well :)
Have made this recipe twice now and its so delicious but mine comes out a lighter yellow color. Am I doing something wrong?